

Where Do I Register My Tesla Powerwall Gateway
- View Larger Prototype
Connecting the Tesla Energy Gateway to your home WiFi network
- Open your Tesla app. On the chief screen, scroll down until you come across "Serial: Tap to reveal".
- Tap on the message and it will reveal your Gateway Serial number. Write this down
- Stand almost your Tesla Energy Gateway, and go to Settings and so WiFi on the app and find a wireless network that has "TEG" followed by the last 3 characters of your gateway serial number (Ex. TEG-123).
- Connect to this network. Y'all may encounter a message saying that yous are not connected to the internet. This is normal because yous just continued to a local network, not an internet network.
- When prompted for a countersign, enter your Gateway Serial number.
- Once connected to the network, open a browser and enter 192.168.91.1 in the address bar. When you start connect, a privacy warning may appear, this only indicates that the browser does non recognize the Gateway document. Yet, it is rubber to click through this alarm and proceed with the connection to the Gateway.
- The next step depends on your browser. In Chrome, click "Advanced;" on the side by side folio, click "Continue." In Safari, click "Evidence Details;" on the side by side page, click "Visit this Website."
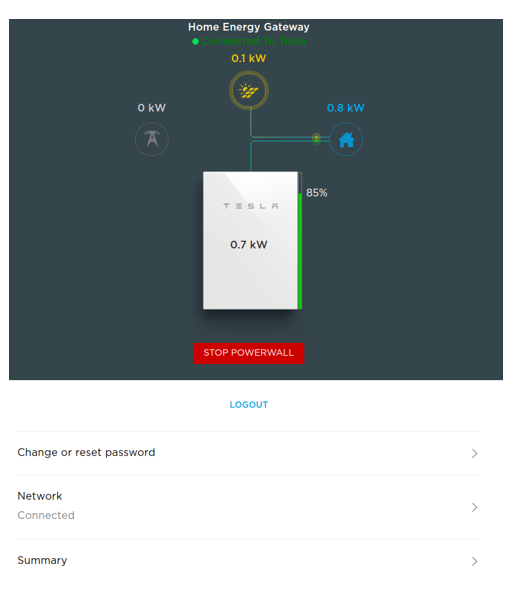
- You'll see the login prompt beneath. Select "Customer" for login type and enter the electronic mail that your Powerwall is registered to. The password will be your Gateway Series number. After signing in, y'all'll see the following:
- Tap on "Network" and then "Wi-Fi" and and then select your abode WiFi network and tap on it. When prompted, enter the countersign for your home WiFi network. The gateway may accept a few minutes to connect to your WiFi. The icon next to "Wi-Fi" will turn greenish when your gateway has successfully connected to your WiFi network.
NOTE: the gateway is only compatible with ii.4 GHz networks. If you lot accept a dual band router that broadcasts ii.four and 5.0 GHz networks, select the two.four GHZ network.

Source: https://solareenergy.com/solar-articles/tesla-energy-gateway/
Posted by: kellywhistry.blogspot.com
0 Response to "Where Do I Register My Tesla Powerwall Gateway"
Post a Comment